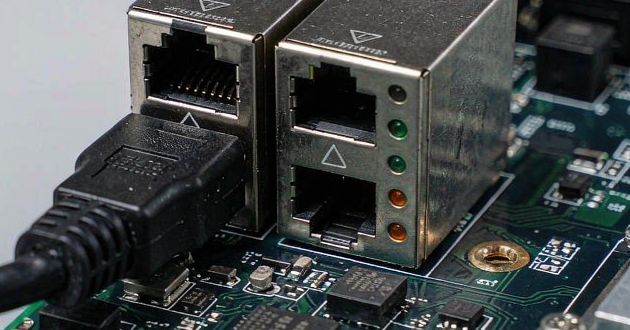
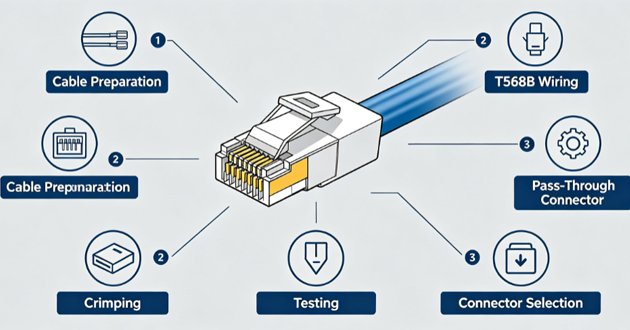
This guide explains how to connect a Cat6 RJ45 connector step by step, including cable preparation, T568B wiring arrangement, pass-through connector installation, crimping, testing, and how to choose the right RJ45 connector for different Ethernet applications.
What Makes Cat6 RJ45 Connector Installation Difficult?
Installing a Cat6 RJ45 connector requires more attention than standard Ethernet cable termination. The main challenges come from the cable structure, wire handling, and connector compatibility.
Larger Cable Diameter
Cat6 cables usually have thicker conductors and larger overall diameters. Choosing an unsuitable RJ45 connector may make wire insertion difficult and affect contact reliability.
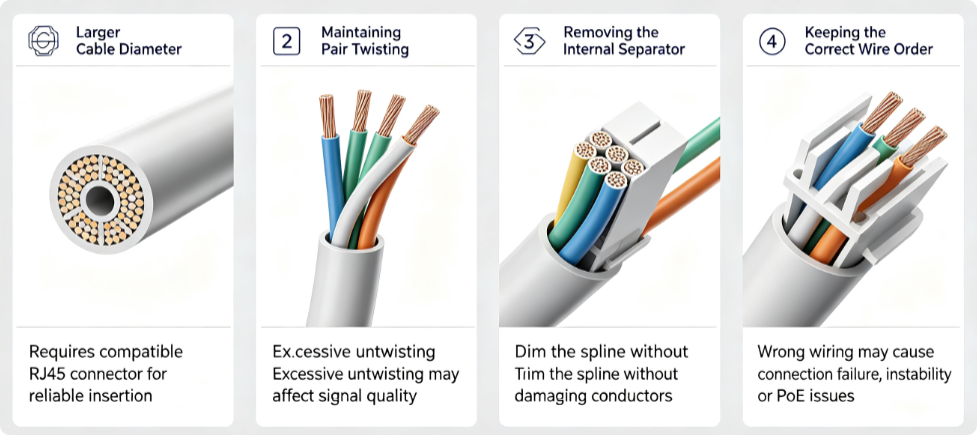
Maintaining Pair Twisting
Cat6 cables use tightly twisted pairs to reduce crosstalk and interference. During installation, excessive untwisting can impact signal quality and Ethernet performance.
Removing the Internal Separator
Many Cat6 cables include a plastic spline to separate wire pairs. This separator must be trimmed properly before termination without damaging the internal wires.
Keeping the Correct Wire Order
Cat6 RJ45 connectors require accurate wire arrangement based on T568A or T568B standards. Incorrect wire placement can lead to:
Connection failure
Network instability
Reduced transmission speed
PoE issues
What Tools Do You Need to Connect a Cat6 RJ45 Connector?
Before starting the installation, prepare the following tools:
Tool | Purpose |
Cat6 Ethernet cable | The cable being terminated |
Pass-through RJ45 connector | Allows easier wire alignment and inspection |
RJ45 crimping tool | Secures contacts and connector housing |
Cable stripper | Removes the outer jacket |
Ethernet cable tester | Checks pin connection and wiring errors |
How Do You Connect a Cat6 RJ45 Connector Step by Step?
Step 1: Strip and Prepare the Cat6 Cable
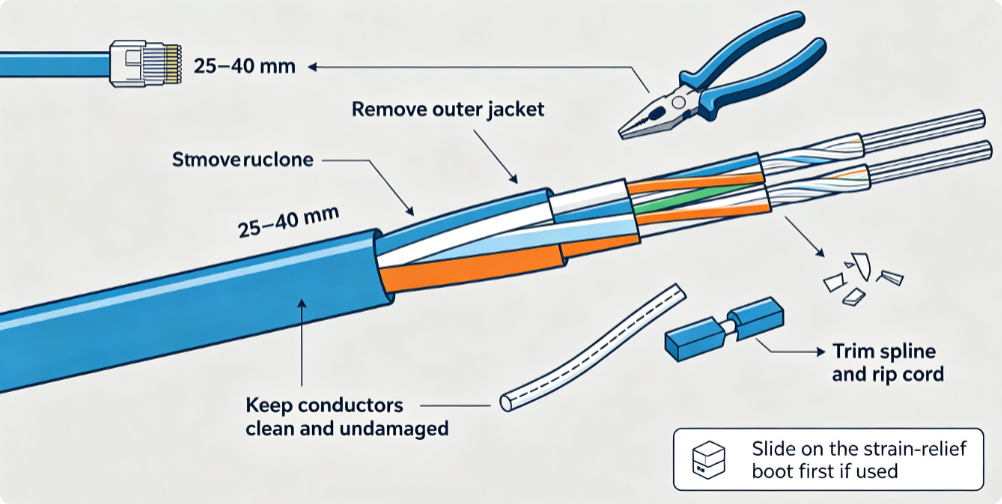
Start by preparing the Cat6 cable before inserting it into the RJ45 connector. If you are using a strain-relief boot, slide it onto the cable first to avoid reinstalling it later.
Use a cable stripper to remove around 25–40 mm of the outer jacket, taking care not to damage the internal conductors. After exposing the cable pairs, remove the plastic spline or separator commonly found in Cat6 cables, and cut away any excess material such as the rip cord.
The goal is to expose the four twisted pairs while keeping the individual wires straight, clean, and undamaged for the next termination step.
Step 2: Arrange Wires According to the T568B Standard
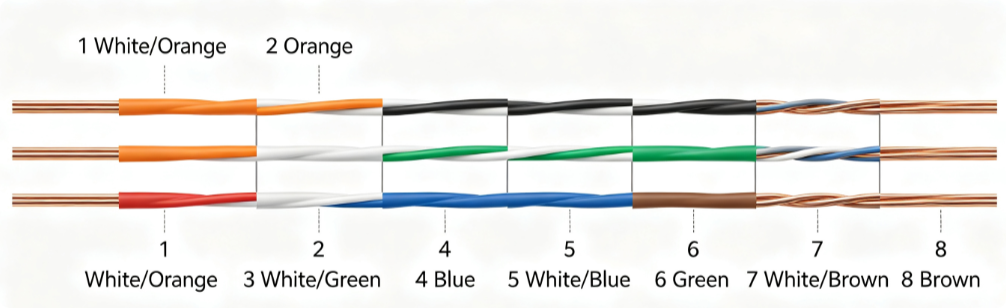
After preparing the cable, arrange the eight individual wires according to the required wiring sequence. For most commercial Ethernet installations, T568B is the commonly used standard.
Straighten each conductor carefully and place the wires in the correct order from left to right:
Pin | Wire Color |
1 | White/Orange |
2 | Orange |
3 | White/Green |
4 | Blue |
5 | White/Blue |
6 | Green |
7 | White/Brown |
8 | Brown |
Keep the wire arrangement flat and consistent before inserting them into the RJ45 connector. Avoid unnecessary untwisting of the pairs, as maintaining the original twist helps preserve Ethernet signal performance.
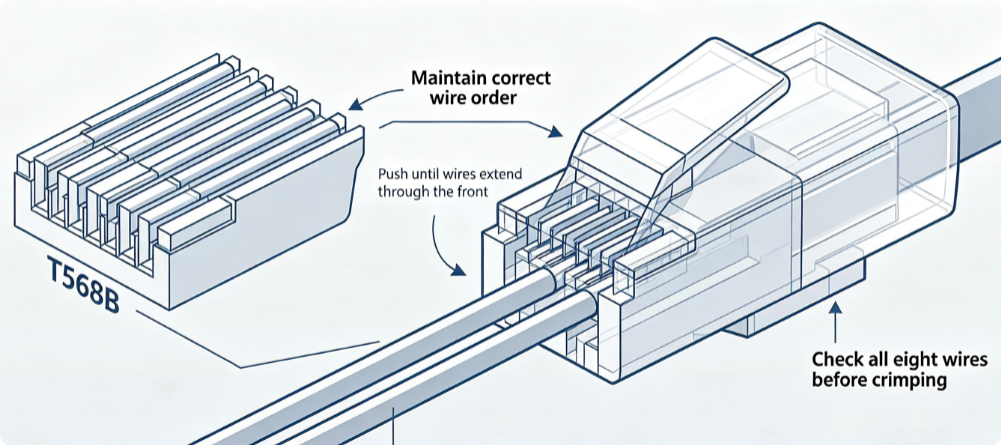
Step 3: Insert the Wires into the RJ45 Connector
Carefully insert the aligned wires into the RJ45 connector while maintaining the correct wire order. If you are using a pass-through RJ45 connector, continue pushing the wires until they extend through the front of the connector. This allows you to confirm the color sequence before crimping and significantly reduces the chance of wiring errors.
Make sure the outer cable jacket extends slightly inside the connector so the crimping tool can grip the cable securely rather than the individual conductors. Before moving to the next step, double-check that all eight wires have reached the end of the connector and remain in the correct sequence.
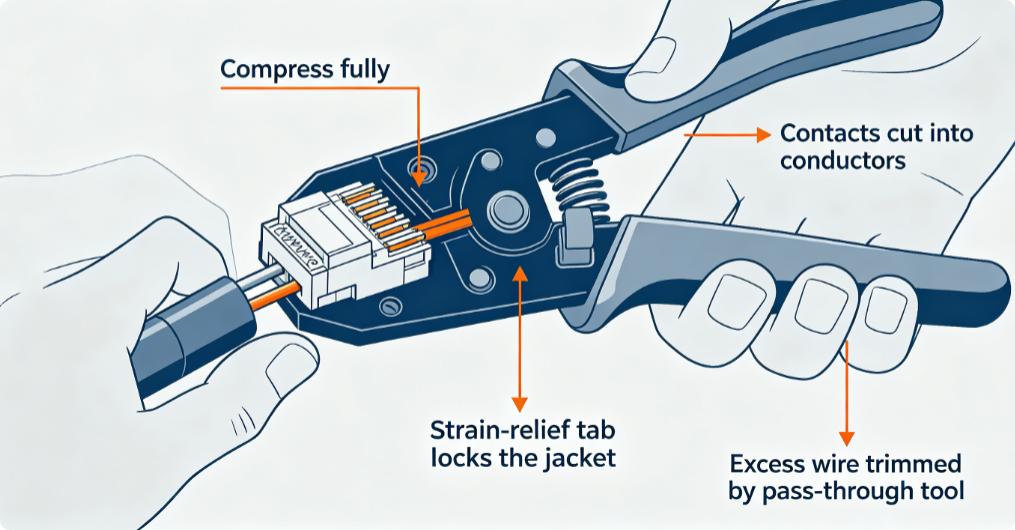
Step 4: Crimp the RJ45 Connector
Insert the RJ45 connector into a compatible crimping tool and squeeze the handles completely to secure the connection. During crimping, the metal contacts are pressed into the conductors, creating the electrical connection, while the strain-relief tab locks onto the cable jacket for additional mechanical support.
If a pass-through connector is used, the crimping tool will also trim the excess wire extending from the front of the connector, leaving a clean and professional finish. A proper crimp ensures stable contact, minimizes signal loss, and improves long-term reliability.
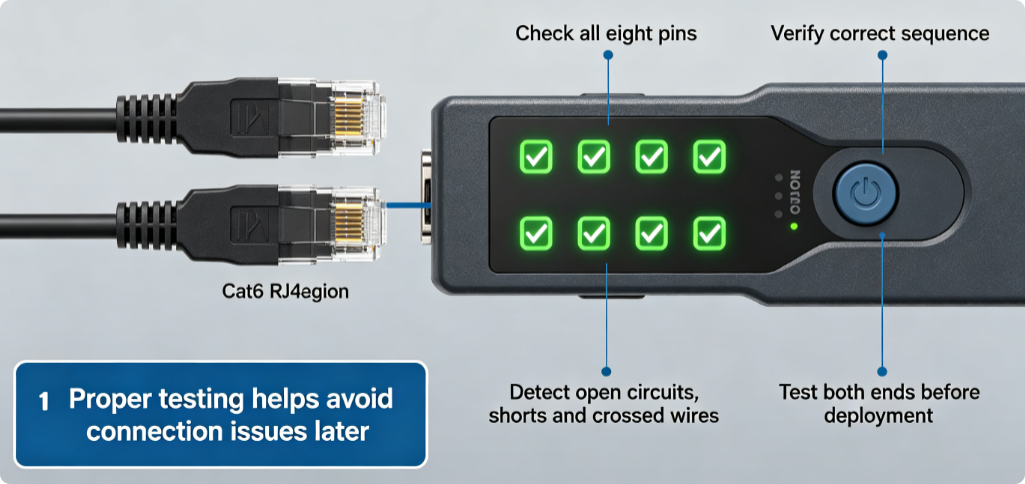
Step 5: Test the Finished Ethernet Cable
After both ends of the cable have been terminated, always verify the connection using an Ethernet cable tester. Testing helps identify wiring mistakes before the cable is connected to switches, routers, or other network equipment.
A properly terminated Cat6 cable should show all eight pins connected in the correct sequence without any open circuits, shorts, or crossed wires. Performing this final check can prevent troubleshooting issues later and helps ensure the cable delivers reliable Ethernet performance.
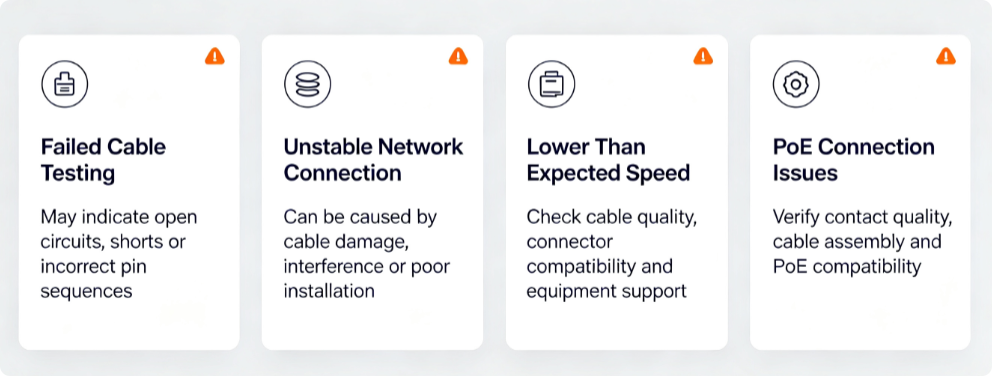
What Are Common Problems When Connecting Cat6 RJ45 Connectors?
Even after a Cat6 RJ45 connector is installed correctly, connection problems may still occur during actual network use. These issues are often related to cable testing, transmission environment, and application requirements.
1.Failed Cable Testing Results
After termination, a cable tester may show problems such as open circuits, short circuits, or incorrect pin sequences. These issues indicate that the cable connection is not ready for network deployment and should be checked before connecting to Ethernet equipment.
Testing both ends of the cable helps identify termination problems quickly and avoids troubleshooting issues after installation.
2.Unstable Network Connection
A Cat6 cable may connect successfully but still experience intermittent network drops or unstable performance. This can happen when the cable is damaged during installation, exposed to strong interference, or used in an environment beyond its intended application conditions.
For industrial or high-interference environments, shielded RJ45 connectors and properly grounded cable systems can help improve connection stability.
3.Lower Than Expected Ethernet Speed
A Cat6 cable does not always guarantee maximum network performance. If the connection speed is lower than expected, possible causes include poor cable quality, excessive signal interference, improper installation conditions, or incompatible network components.
Ensuring that cables, RJ45 connectors, and Ethernet devices support the same performance level is important for achieving reliable data transmission.
4.Connection Issues in PoE Applications
For PoE-enabled devices, such as IP cameras, wireless access points, and industrial network equipment, RJ45 connections must support both data transmission and power delivery.
If a PoE device fails to receive power or frequently disconnects, the cable assembly, connector design, and contact quality should be checked to ensure stable power transmission.
Can I Use Any RJ45 Connector for Cat6 Cable?
No. Cat6 cables require RJ45 connectors that match their performance requirements. While the RJ45 interface is the same, different connectors may vary in conductor support, shielding design, and application capability.
For example, shielded RJ45 connectors are suitable for environments with electromagnetic interference, while PoE-compatible connectors are designed for devices that require both data and power transmission.
Why Is My Ethernet Speed Lower After Making a Cat6 Cable?
Lower Ethernet speed does not always mean the Cat6 cable itself is the problem. Performance can be affected by the cable assembly, network equipment compatibility, or installation conditions.
If the connection speed is below expectations, check whether the cable components meet Cat6 requirements and whether the RJ45 connectors are suitable for the intended application.
How to Choose the Right RJ45 Connector for Cat6 Applications?
For network equipment manufacturers and system integrators, choosing the correct RJ45 connector is as important as correct cable wiring.
Different applications may require different connector designs:
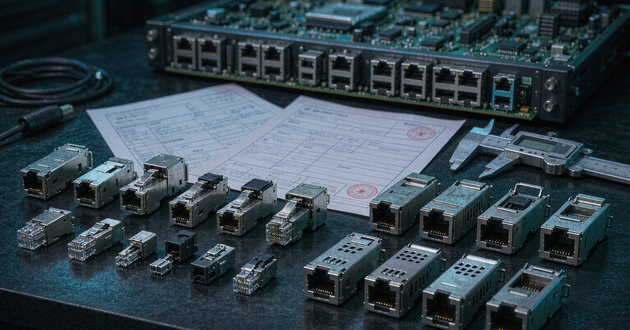
RJ45 Connector Type | Typical Applications |
Standard RJ45 Connector | General Ethernet devices, switches, routers |
Shielded RJ45 Connector | Industrial environments with EMI interference |
Magnetic RJ45 Connector | Network equipment requiring signal isolation and protection |
PoE RJ45 Connector | IP cameras, wireless access points, powered Ethernet devices |
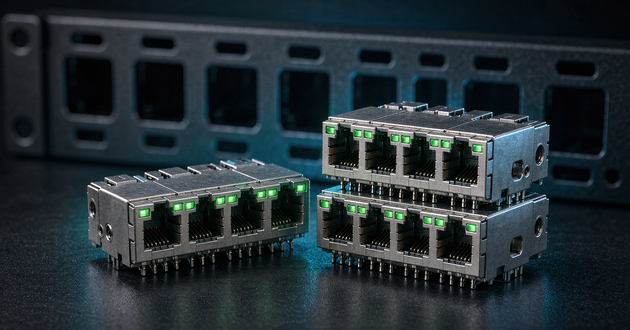
LED RJ45 Connector | Equipment requiring connection status indication |
Conclusion
Connecting a Cat6 RJ45 connector becomes easier with the right tools, proper wiring methods, and a connector design that matches the cable requirements.
Pass-through RJ45 connectors can simplify termination by improving wire alignment visibility and reducing installation errors. However, reliable Ethernet performance also depends on choosing the right connector solution for different applications, including shielding requirements, PoE support, and operating environments.
For network equipment, industrial Ethernet, PoE devices, and communication systems, selecting a reliable RJ45 connector helps achieve stable signal transmission and long-term connection performance.
Contact GLGNET to discuss your RJ45 connector requirements and find a suitable solution for your project.