Crimping an RJ45 connector is an essential skill for anyone setting up or maintaining an Ethernet network. Whether you’re running cables for your home office, creating custom lengths for a specific installation, or simply upgrading your current network setup, knowing how to properly crimp an RJ45 connector is crucial for ensuring reliable and high-speed connections.
In this step-by-step guide, we’ll walk you through the process from start to finish, covering everything from preparing your cables to testing your completed connection. By the end, you’ll be equipped with the knowledge and skills to crimp your own RJ45 connectors with confidence, ensuring a secure and efficient network.
How to Crimp an RJ45 Connector Step by Step
Tools You’ll Need for Crimping an RJ45 Connector
Step-by-Step Guide to Crimping an RJ45 Jack Connector
-Strip the Cable for RJ45 Connector
-Untwist & Straighten Wires
-Arrange Wires for RJ45 Connector
-Trim Wires for Proper Fit
-Insert Wires into the RJ45 Jack Connector
-Crimp the RJ45 Connector
-Test the RJ45 Cable
Tools You’ll Need for Crimping an RJ45 Connector
To successfully crimp an RJ45 connector, there are a few key tools you'll need. The first and most essential is the RJ45 crimping tool. This tool is designed to attach the connector securely to the cable by pushing the connector’s metal pins through the wires, establishing a stable electrical connection.
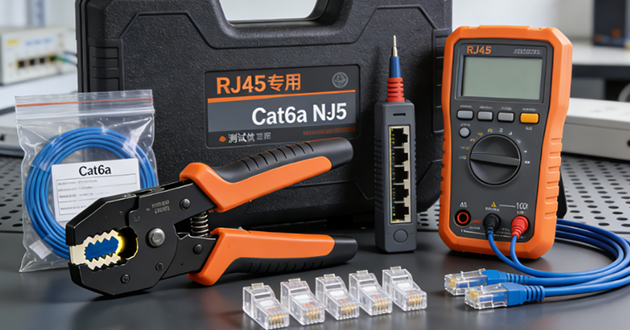
Next, wire strippers are crucial for carefully removing the outer jacket of the cable without damaging the inner wires. You'll use the strippers to expose about an inch of the wire, preparing it for insertion into the RJ45 connector.
While not strictly necessary, flush-cut pliers are a handy addition if your crimping tool doesn’t trim the wires after insertion. These pliers help ensure the wires are trimmed evenly and correctly, making it easier to insert them into the connector.
Finally, you’ll need the RJ45 connectors themselves. These are the components that will be crimped onto the cable to enable a reliable Ethernet connection. After arranging the wires in the correct order, you’ll insert them into the connector, and the crimping tool will secure everything in place, ensuring a strong and functional connection.
Step-by-Step Guide to Crimping an RJ45 Jack Connector
Crimping an RJ45 jack connector is an essential skill for anyone working with Ethernet cables. By following these steps carefully, you can ensure your network cables are properly crimped and ready for use.
Strip the Cable for RJ45 Connector
The first step in crimping an RJ45 connector is to strip the outer jacket of your Cat5e or Cat6 cable. Using wire strippers, carefully remove about one inch of the jacket without damaging the internal wires. Take your time with this step—it's vital to avoid nicking or cutting the individual wires inside, as that could impact the crimping process.
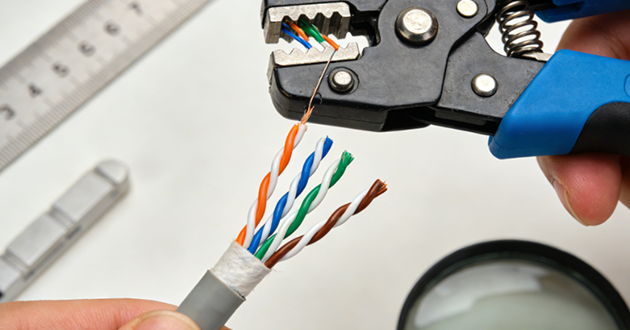
The outer jacket is designed to protect the wires from external interference, so once removed, ensure that the insulation around each wire remains intact. By leaving approximately one inch of stripped cable, you’ll have sufficient space to insert the wires into the RJ45 jack connector. This also ensures the outer jacket fits securely into the connector base, providing a tight and stable connection.
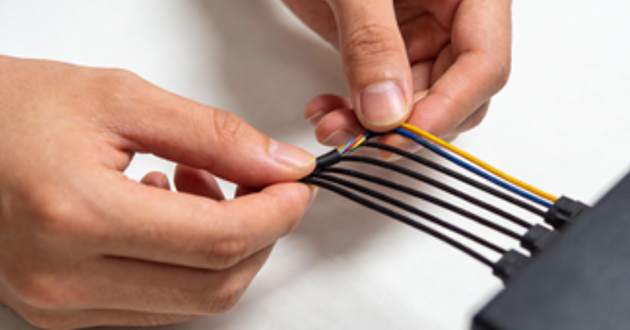
Untwist & Straighten Wires
Once the jacket is stripped, you'll see that the wires inside are twisted into pairs. Begin by untwisting each pair carefully, only as much as necessary to prepare them for proper arrangement. Be mindful not to twist the wires too much, as excessive untwisting can affect their performance and make them harder to handle.

After untwisting, the next step is to straighten the wires. Gently straighten each of the eight wires, using your fingers or a flat surface for alignment. Straightening the wires is essential, as it makes arranging them in the correct order much easier. This step ensures the wires are properly aligned and ready to fit neatly into the RJ45 connector, facilitating a strong, reliable connection.
Arrange Wires for RJ45 Connector
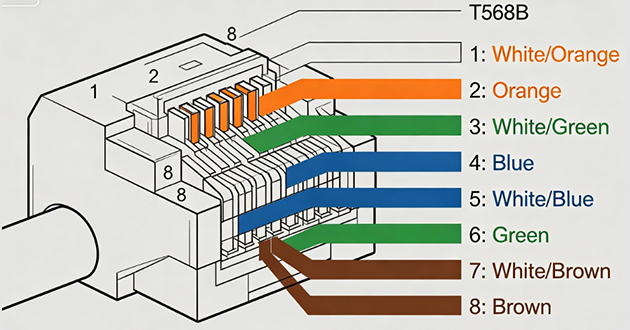
Once the wires are straightened, it’s time to arrange them according to a specific wiring standard. The two primary standards for wiring an RJ45 connector are T568A and T568B. The choice of standard depends on your network setup, but T568B is more commonly used in residential and office environments. No matter which you choose, just make sure both ends of the cable follow the same standard to ensure compatibility across your network.
Here is the T568B color order for your reference:
Pin 1: White/Orange
Pin 2: Orange
Pin 3: White/Green
Pin 4: Blue
Pin 5: White/Blue
Pin 6: Green
Pin 7: White/Brown
Pin 8: Brown
To arrange the wires, lay them side by side in the T568B order. Each wire should be aligned with its corresponding pin on the RJ45 connector, ensuring they lie flat and straight, without any twists or overlaps. It's crucial to double-check the alignment before moving on—just one misplaced wire can result in a faulty connection, causing your network to malfunction or fail entirely.
Tip: A helpful trick is to place the RJ45 connector on the table and align the wires with the pins inside the connector before inserting them. This visual check ensures the wires are correctly arranged and will fit properly into the connector, ensuring a smooth crimping process.
Trim Wires for Proper Fit
After the wires are arranged, the next step is to trim them to the correct length. Trimming the wires ensures they fit perfectly inside the RJ45 jack connector and make solid contact with the connector's metal pins.
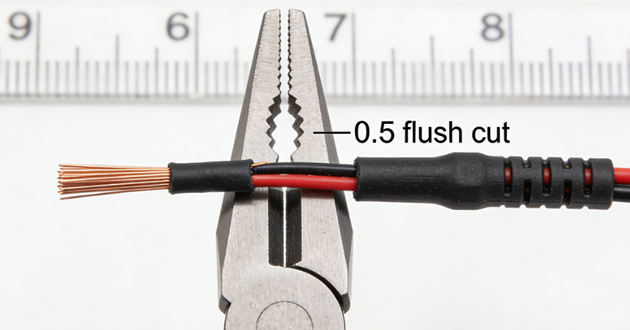
Using the cutting tool on your crimping tool or flush-cut pliers, trim the wires so that they are all the same length—approximately half an inch from the end of the outer jacket. This length is ideal, allowing each wire to make full contact with the pins while still leaving enough wire inside the connector for a secure electrical connection.
It’s important to trim the wires evenly. If they are too long, they may not fit into the connector properly or could extend beyond the connector, which may cause issues with the connection. If the wires are too short, they might not reach the pins inside, preventing a solid connection and leading to network problems.
Once the wires are trimmed, ensure that they remain in the correct order and that none have shifted during the trimming process. Wires can easily become misaligned at this stage, so take extra care to check their arrangement before proceeding. Properly trimmed wires make the crimping process smoother and ensure a reliable network connection.
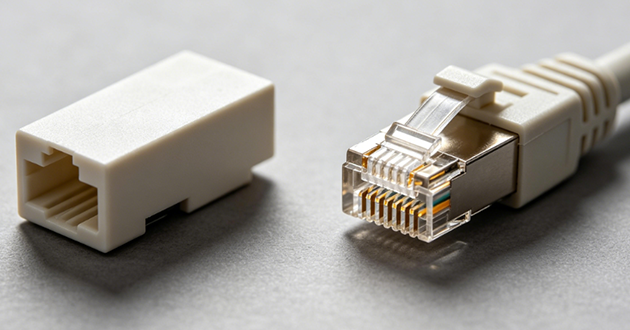
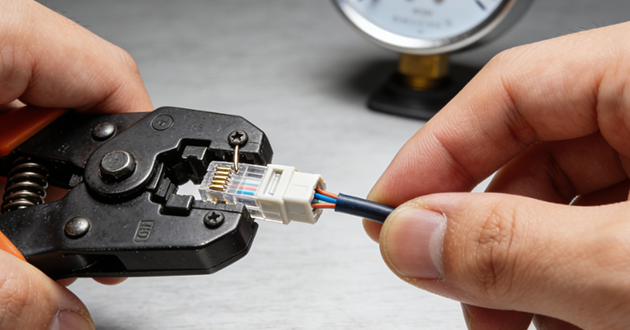
Insert Wires into the RJ45 Jack Connector
Now that the wires are neatly arranged and trimmed, it's time to insert them into the RJ45 connector. Gently slide each wire into its designated slot in the connector, making sure they fit snugly. The metal pins inside the RJ45 jack connector should align perfectly with the wires, creating a solid connection once crimped. It’s essential to take your time here—ensure no wires are twisted, out of place, or overlapping. Even a small misalignment can lead to poor connections and network issues later.

Make sure that the outer jacket of the cable slides into the base of the connector. This step is crucial for ensuring a secure connection. The outer jacket should rest flush with the edge of the RJ45 connector, helping hold the cable in place during the crimping process. This additional support ensures a tight and lasting grip, preventing the cable from slipping out and guaranteeing the integrity of the connection.
Crimp the RJ45 Connector
With the wires in place, it’s time to crimp the connector. Insert the RJ45 connector into the crimping tool, positioning it correctly so that the metal pins are facing down. Once positioned, apply firm, even pressure to the crimping tool handles. This will push the metal pins through the wires, creating a solid connection between the wires and the pins in the RJ45 connector.
If you’re using pass-through connectors, the crimping tool will also trim any excess wire that extends past the connector, ensuring a neat and flush finish. It’s important to apply enough pressure to create a secure connection, but be careful not to over-crimp, as this could damage the RJ45 connector or cause the wires to become misaligned or disconnected.
A well-crimped RJ45 jack connector ensures a reliable, durable network connection, providing long-term performance without failure.
Test the RJ45 Cable
After crimping, the next step is to test the RJ45 cable to ensure it’s functioning as expected. Use a network cable tester to check if all eight wires are properly connected and that the cable is operating as it should. The tester will alert you to any miswires, open circuits, or shorted connections.
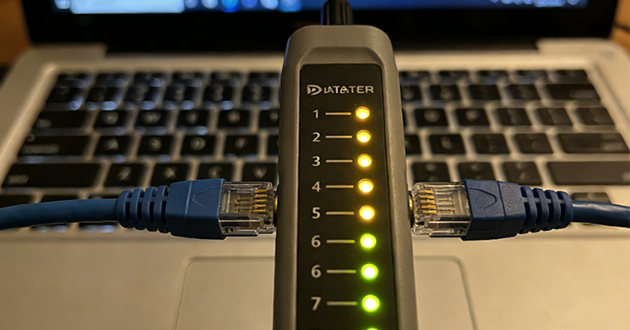
If any issues arise during the test, go back and double-check the wiring order to ensure each wire is in the correct slot. If you find any problems, you may need to strip the cable again, re-align the wires, and repeat the crimping process.
Testing your cable before installation is essential—it helps prevent wasted time and effort in the future. Ensuring your RJ45 connector is properly crimped and fully functional will guarantee a stable, reliable network connection for your home or office setup.
Conclusion
With these steps, you should now have a solid understanding of how to crimp an RJ45 connector properly. From stripping the cable to testing the final product, every step is vital to ensuring a strong, reliable Ethernet connection. By following this guide and using the correct tools, you can create custom-length network cables for any situation, all while avoiding common pitfalls that might lead to poor performance or connectivity issues.